|
Click on pictures to enlarge
|
Restoration of a
1956 Norge Time-Line Automatic Washer
|
 |
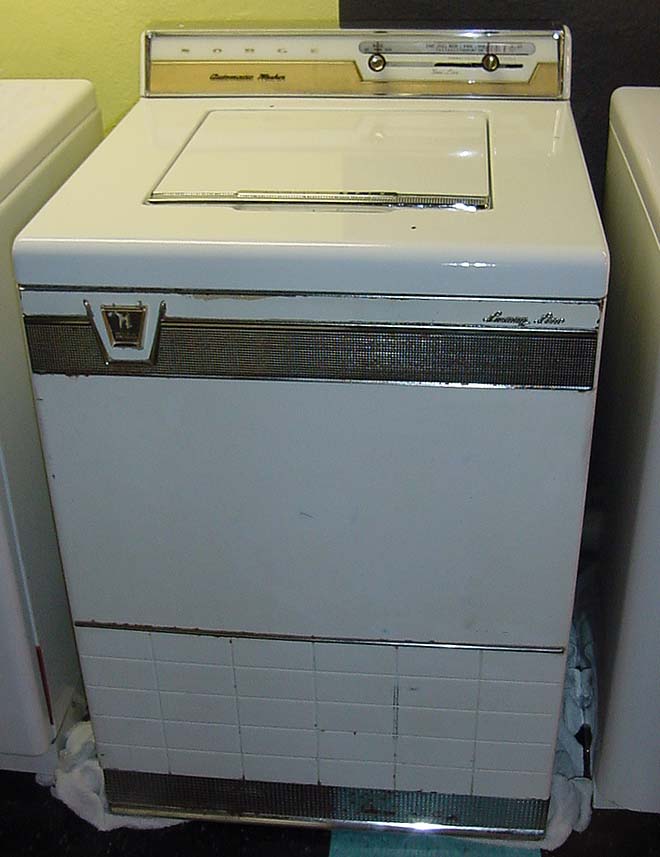
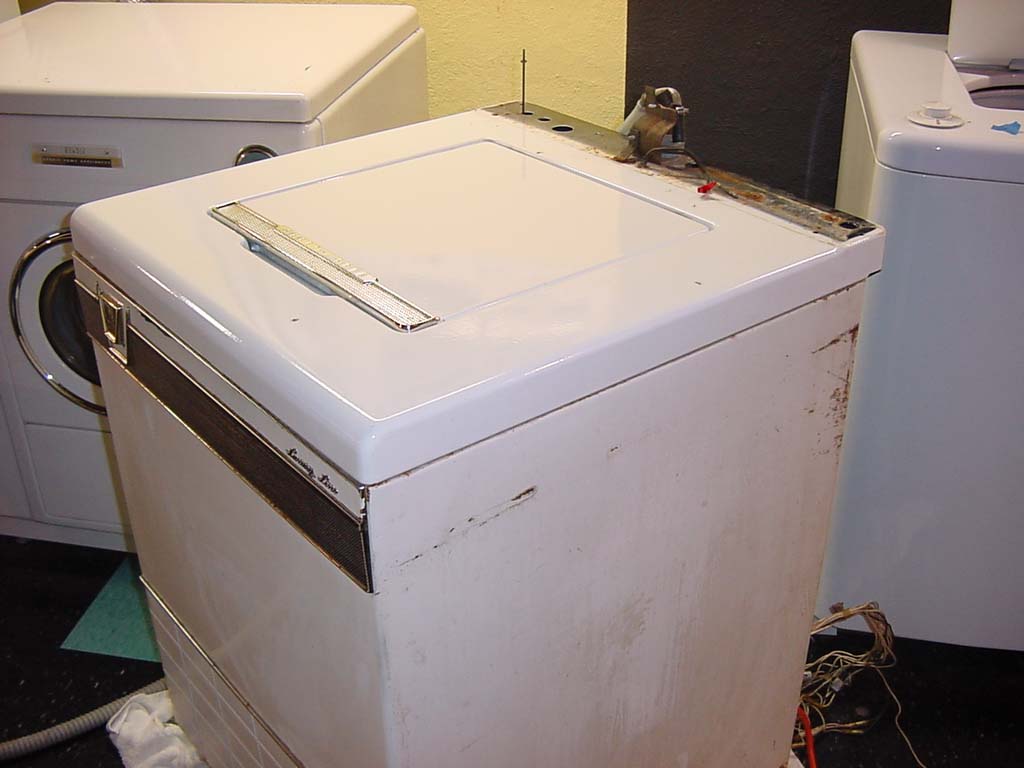
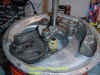
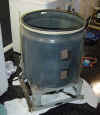
Introducing my
1956 Norge Time-Line Automatic Washer.
I believe this washer was Norge’s fourth washer design after a
failed 1950 front-loader, then their first top-loader in 1952 and a minor
redesign in 1954. This
washer, model AW450-LS, was Norge’s first washer to have a lighted
control panel.
I found the
machine back in June ‘96 at an estate sale in a terribly neglected and
run down home in south Minneapolis. What
was ironic about the Norge was I found it only one day after dropping my
Apex off at the recycler, a sad day indeed, so I considered the Norge sort
of a consolation prize, but hardly a consolation.
I have only seen four 1950’s Norge designed washers in my life
and three of them were rusting away on the Aberdeen Farm and are now
stripped of parts or crushed. This leaves this machine as the only 1950s
model Norge known in existence.
When I first
found the machine it needed a new pump (luckily I found one brand new) and
some other minor issues taken care of, so I didn’t do a complete
restoration at that time. I
had used the machine gently for almost five years when suddenly I noticed
that the agitation and spin had started to slow down, but yet the motor
was not straining or slowing in anyway.
Taking a look underneath I found a huge puddle of oil on the floor
and all over the interior of the cabinet.
Oh dear, its now time for that complete restoration I had been
putting off. |
 |
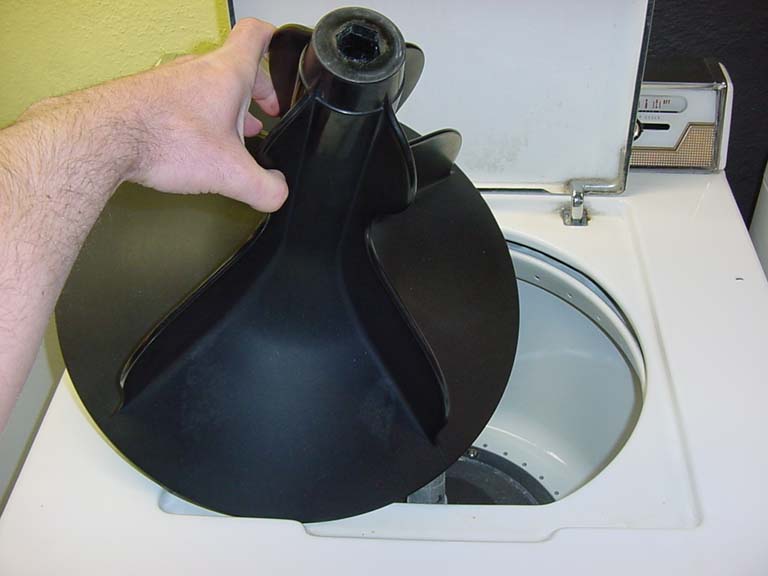
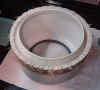
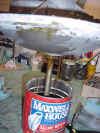
In my
travels over the past five years I have slowly but surely collected rare,
new-old-stock parts for the machine including this agitator. Most of these
parts I carefully stored away awaiting this restoration that I knew would
have to be done someday. So
lets, begin, of course the very first step in a complete restoration is to
take the machine entirely apart. This
is going to be a big job because there is a lot of oil to clean up and the
cabinet and some of the trim needs a complete paint job. |
 |
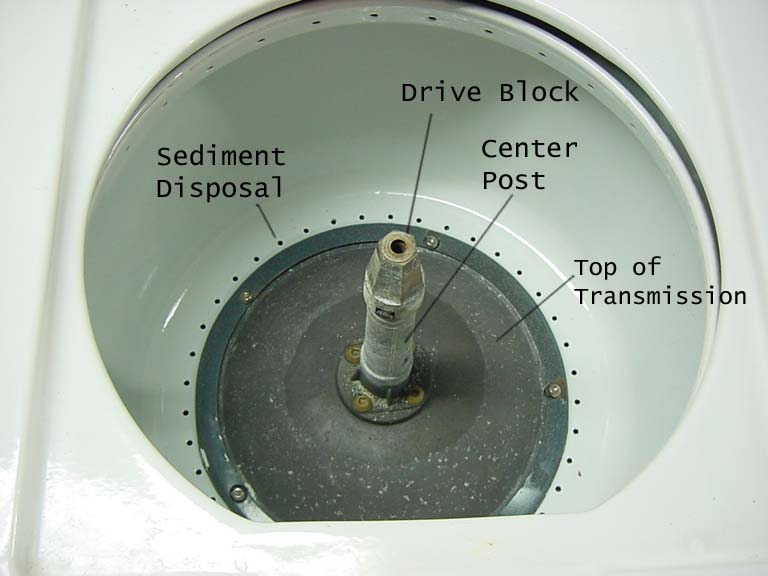
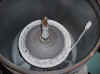
With the
agitator removed you can see the drive block and center post as well as
the sand and sediment disposal exit holes that are normally hidden under
the agitator. I found the
sediment tube completely clogged with a sandy residue, no wonder why my
Norge wasn’t very good with disposing sand!
Another interesting point underneath the agitator is you can see
the top of the transmission just like in the Maytag AMP design. |
 |
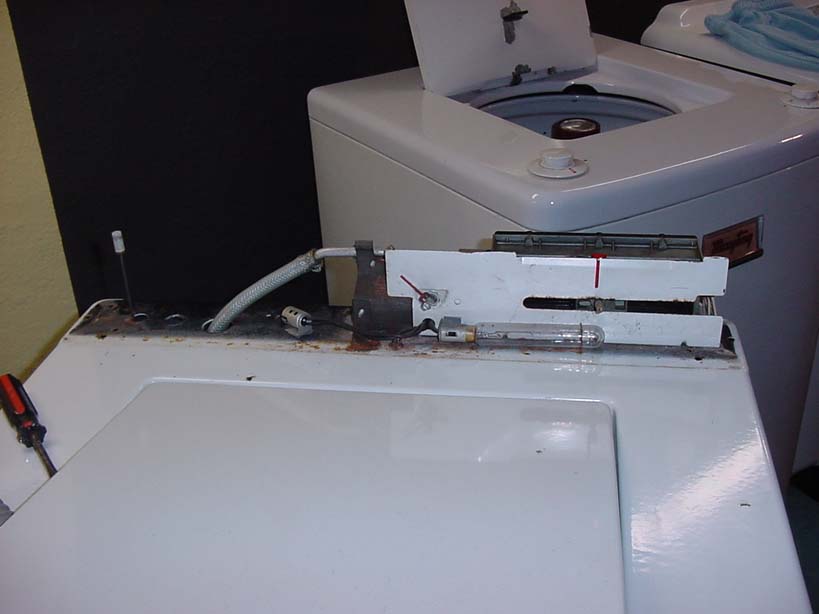
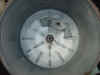
Here is
the control panel removed. You
can see the red time-line pointer as well as the rusted metal slideway
that needs painting. Notice
the water inlet hose and air gap is located inside the control panel,
which caused problems. As the machine aged, lime deposits would form on
the inlet flume opening, which caused water to splash into the electrical
contacts in the control panel. Spark-Spark-ZZZZZZzzzztt. |
 |
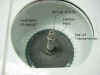
Check out
this very creative and unusual timer design.
You can see the big crank-screw on top that is turned by the timer
motor which moves the slider down the timer body.
The slider contacts metal bars behind it to activate the switches
that run the motor, brake solenoid, water valves, suds pump, etc.
Unfortunately timer motor on my timer works only sporadically so I
sent the entire timer to Midwest Timer Service, but they sent it back
stating they have no parts to rebuild it at this time.
After an entire evening of experimentation, I found that I could
rig up a slightly different style of timer motor that seems to work well.
Thank goodness for a collection of parts to play with. |
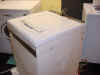 |
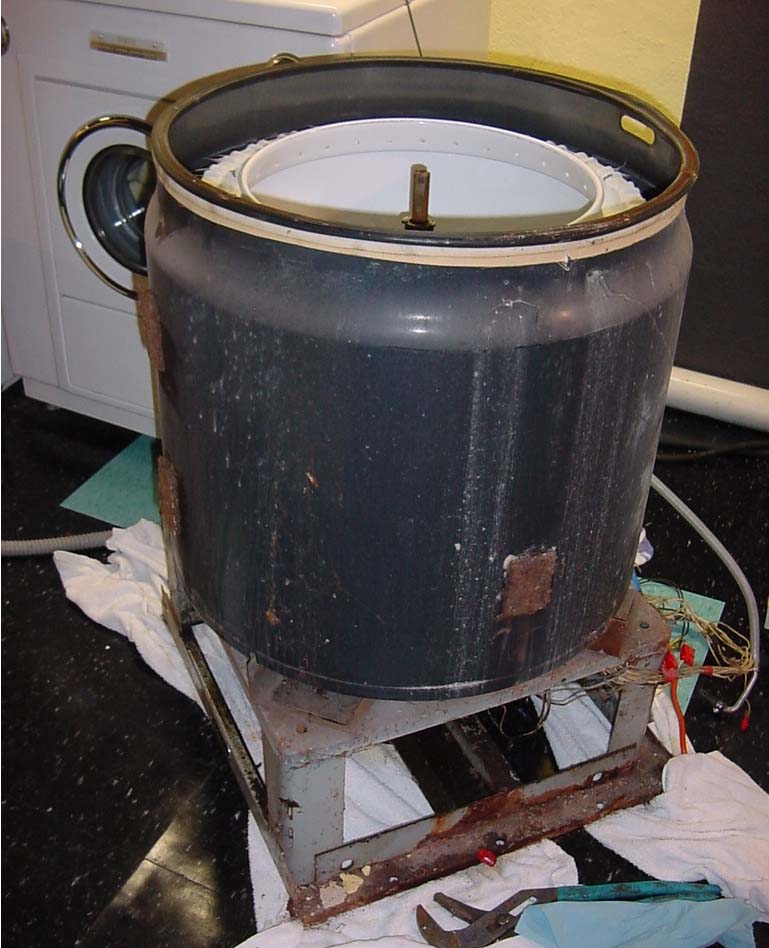
Here is a
view with the top almost complete disassembled with the exception of the
water inlet hose and flume assembly.
You can see how badly the cabinet needs to be sanded and painted. |
 |
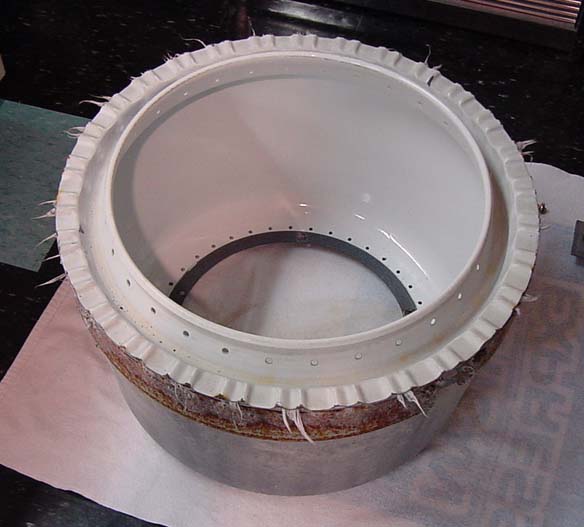
The early
design of Norge washers did not allow you to remove the top for service
without removing the entire cabinet.
The top is held down on the cabinet by four clips that are only
accessible after your remove the entire cabinet, to say this is a
servicing nightmare is an understatement.
To remove it you must remove the ten bolts that hold that cabinet
to the washer base located at the very bottom of the cabinet.
With the cabinet pulled up and off you can see where water was
seeping through the top seal during spin, I will have to clean up the
outer tub and fix the seal during the reassembly process. |
 |
Now for
the next challenge, when I first found the machine I noticed that the
Norge used these strange screw heads to hold down the tub and center post.
This odd screw head is sort of shaped like an hourglass and
obviously needs a very specialized screwdriver to remove them.
So turning to the internet I found that this type of screw is
referred to as a “clutch-head” screw. Apparently Chevrolet commonly
used this type in the mid-1950s. Luckily
I was able to find three different sizes of Clutch-head screwdrivers
locally at a vintage auto-repair specialty store. |
 |
With my
trusty new screwdriver the screws turned easily (which doesn’t usually
happen with old washer tub screws) and out popped the tub.
YAY. |
 |
Check out
the top of the transmission, which makes up the transmission cover, a
ledge to hold the tub, a groove to capture the sediment and a tube to
supposedly get rid of the sediment via centrifugal force. |
 |
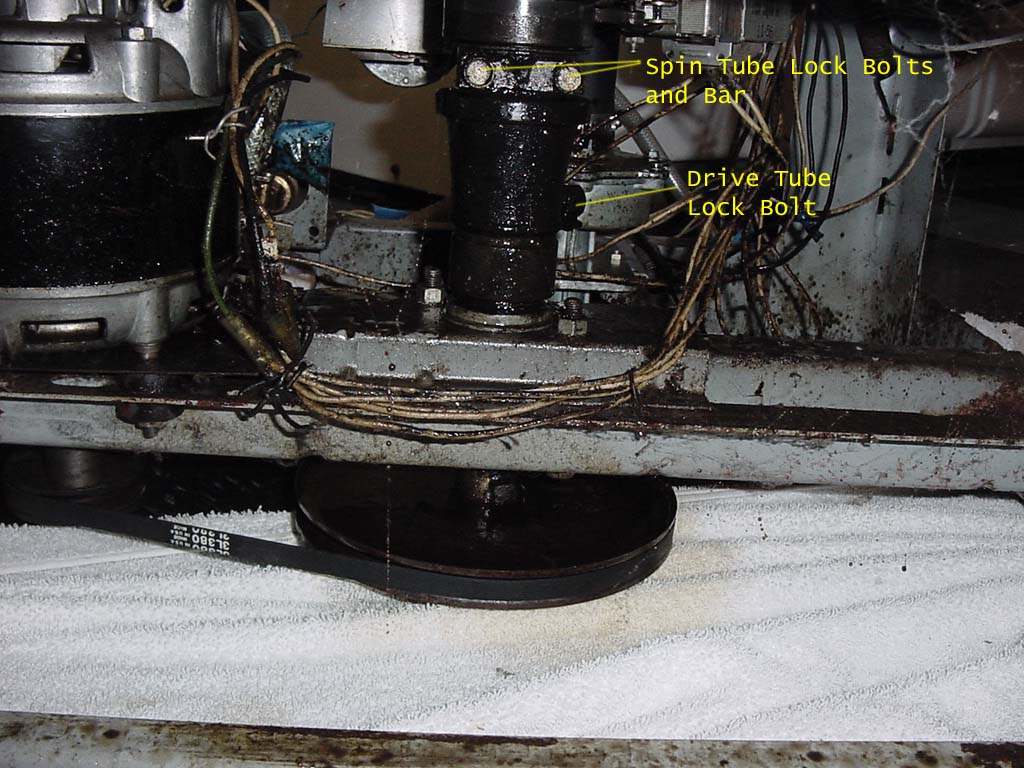
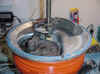
Look at
the mess underneath here! To
remove the tranny you first remove the two bolts and steel bar that lock
the spin tube to the brake hub assembly.
Then you remove the bottom bolt that holds the main drive tube to
the drive hub. Now you can
pull the transmission out through the top of the outer tub. |
 |
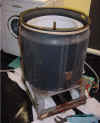
Here is
the transmission out on the workbench ready for a complete restoration.
If you look at the bottom of the drive tube you can still see more
oil oozing out of the tranny. Luckily
the oil seal was the same part and part number used in Norge transmissions
from 1952 all the way through the late 1970s so I was able to find a new
seal rather easily. |
 |
Here’s
another servicing nightmare, there is only on way to drain a Norge tranny
of oil. You have to remove
the center post then hold it upside down for about 10 minutes for the oil
to ooze slowly out of the little oil fill/drain hole on top of the
transmission cover. The Norge
tranny uses 12 full cups of oil, although at least three cups had seeped
out all over the basement floor. |
pict
to
come |
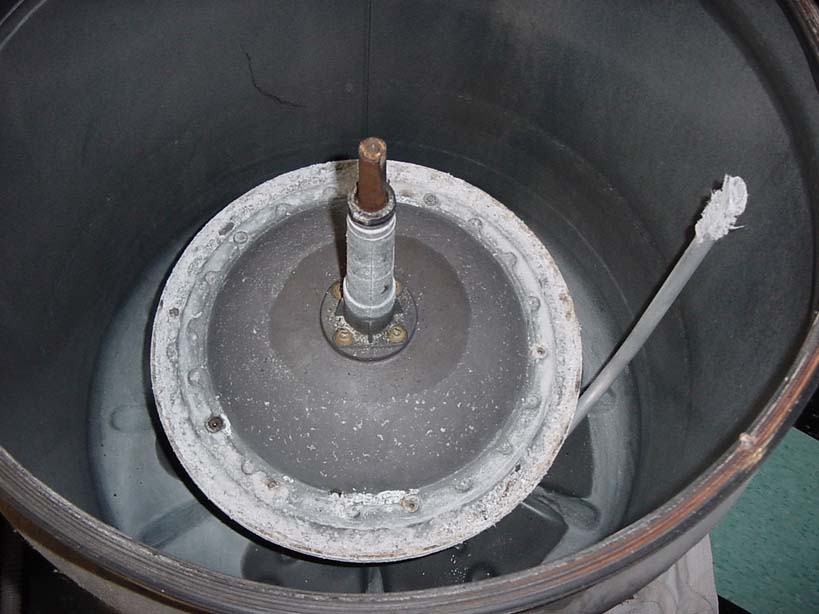
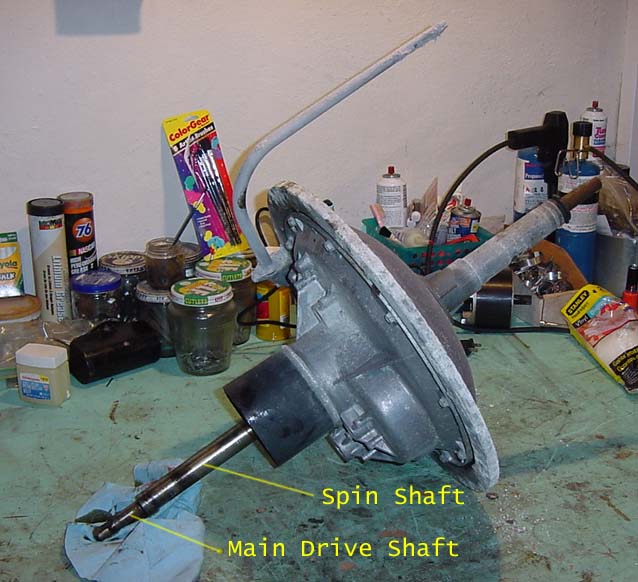
Here is a view under the transmission, you can
see the spin shift with is simply bolted to the bottom of the
transmission. Inside the spin
shaft is the drive shaft, which is always rotating whenever the motor is
rotating. When the motor is
turning counterclockwise the brake holds the spin shaft stationary and
which prevents the transmission from turning but since the drive shaft is
allowed to turn it turns the gears inside the transmission and this causes
the agitator shaft to oscillate back and forth. When the brake releases
and the motor is reversed and turns clockwise the both the drive shaft and
spin shaft turn together at the same speed.
This causes the tub to spin because it’s bolted directly to the
transmission. The agitator on
the other hand is rotated round and round with the tub and not back and
forth because both shafts are being driven at the exact same speed which
counters any movement of the transmission gears. |
 |
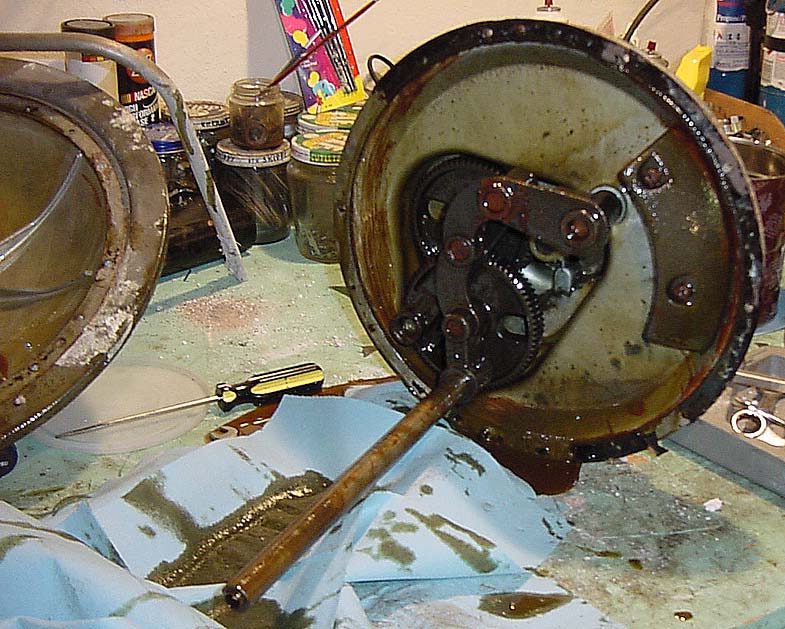
YUK, well here is the opened transmission, this
is the first time in 47 years that these parts have seen the light of day.
It’s a rather simple mechanism of a few reduction gears and a
crank/sector rod and of course the agitator shaft.
The part that is in the 2:00 position is simply a counter weight to
balance the weight of the gears at the 7:00 position during spin. |
 |
After unbolting the spin shaft and removing the
drive shaft and pinion from the transmission the leaky oil seal shows its
ugly head. Thank goodness
Norge used the same oil seal from 1952 all the way through the 1970s so I
was able to find a replacement rather easily.
The oil leaked down the spin shaft and out through the drive shaft
onto the drive pulley and out all over the cabinet. |
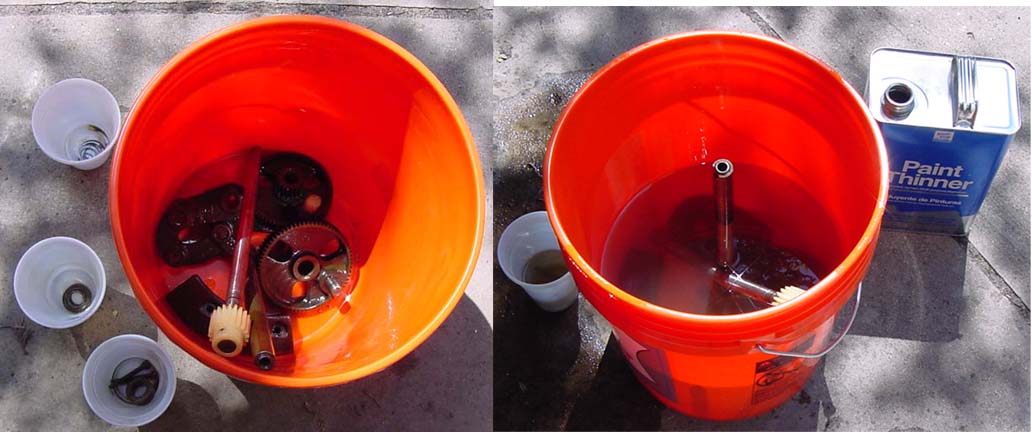 |
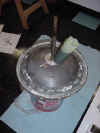
I’ve placed all the large parts in a bucket
and I’ve placed the really small parts in a separate cup to make it
easier to remove them after the cleaning.
I use simple paint thinner and let them soak for a few hours.
Then I laid them out in the sun and let them dry.
Be careful not to get any solvent on the plastic pinion of the
drive shaft as plastic and paint thinner or most other solvents do not
mix. Speaking of plastic and
paint thinner I used a plastic cup for the small parts, but this was not a
good idea as it started to melt and I needed to move the parts to a metal
cup. |
 |
After an hour or so in the nice warm sunshine I
moved the parts safe and sound to finish drying in the basement.
Look how nice and clean they came out! |
 |
Check out one of the main gears of the
transmission. Notice how
there is almost no wear on this gear even after 47 years of service.
Being soaked in an oil bath and using good solid parts makes all
the difference. |
 |
Well here is the tranny back together.
Notice the plastic pinion. I was surprised to see a plastic part in
this transmission but maybe they did that to make the machine quieter??
Anyway the plastic pinion is connected to the drive shaft, which of
course is connected to the hub that is driven by the machine motor.
The two dowels on the transmission cover serve the purpose of
helping align the transmission base and top cover snugly together.
They caused problems later though as you will see. |
 |
Normally I cut new cork gaskets for pumps and
transmission housings, but this tranny was so big that I didn’t have a
piece of cork that was wide enough so I just used silicone.
Silicone is by far a better gasket than cork, but it’s a pain if
you need to open back up the tranny at a later date. |
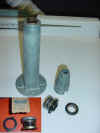 |
Check out some of these beautiful new old stock
parts I found for the Norge, a new Center Post, Center Post Seal, Drive
Block and outer tub Water Seal that seals the bottom of the transmission
with the outer tube boot. I
have been collecting parts for this inevitable restoration for almost five
years now. |
 |
Now the topping on the cake for the tranny is
refilling it with three quarts of oil and its ready to go. |
 |
OK moving on its time to remove the outer tub
and clean the base. I was
SHOCKED to find out that the outer tub is not bolted to the base, its
simply sitting on four little brackets.
All you have to do is remove the outer tub boot (as shown in the
next picture) and pick the outer tub right up and off! |
 |
Here is the water seal boot at the bottom of the
outer tub. Even though this
boot is just fine, I have a brand new one for another 47 years of good
service (so I hope). |
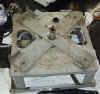 |
Here is the base of the Norge washer.
I’ve read many times about the suspension leafs of the Norge but
I have never seen them in person before.
It’s simpler than the repair manual makes it out to be.
Those four brackets are floating on damper pads to snubber the
vibration during spin. All
four brackets shake with the spin tub during spin, the more the unbalanced
load, the greater movement those brackets make. |
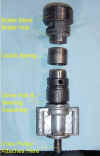 |
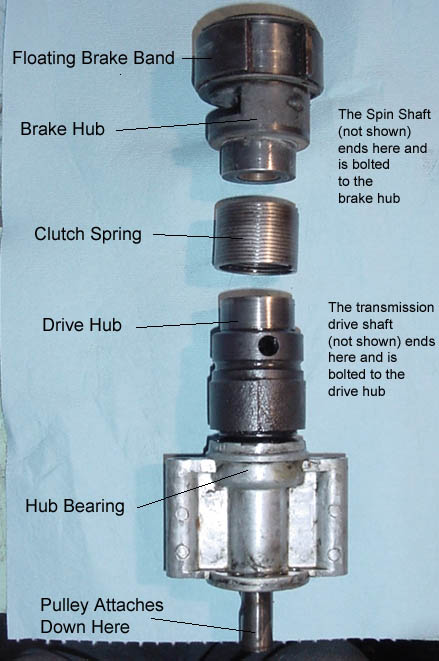
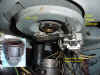
Here’s the part you’ve all been waiting for, the
drive system of the Norge. Remember
I said that the top of the Spin Shaft is bolted to bottom of the
transmission and the Transmission Drive Shaft goes into a hub that is
turned by the motor. Lets
work from top down to see how this all happens.
Agitation: The
very bottom of Spin Shaft is bolted to the Brake Hub (spin shaft has been
removed from this picture). During
agitation the brake hub is prevented from turning by a special latch and
motor is driven counterclockwise. There is a Clutch Spring attached to the
bottom of the brake hub and the top of the drive hub.
The drive hub is always turning when the motor is operating in
either direction, but since this spring unwinds when it is turned
counterclockwise it loosens its grip on the Brake Hub removing any torque
that would strain on a locked brake hub.
Since the transmission Drive Shaft is pressed into the drive hub
(drive shaft has also been removed in this picture) it turns with the
Drive Shaft, which turns the gears in the tranny to produce agitation.
Spin: After a
brief pause to allow the motor to reverse the brake latch is pulled back
which releases the Brake Hub and the motor begins to turn clockwise.
Because of the clockwise movement, the Clutch Spring now winds down
tight and grips hard on the bottom of the Brake Hub and the top of the
Drive Shaft. The Drive Hub
and Brake hub are now locked tightly together and they now turn both the
Drive Shaft and Spin Shaft at the same time together.
Since the Spin Shaft is bolted to the Drive hub everything turns
(including the tub) and the machine is brought up to full 625rpm spin
rather quickly. |
 |
Brake: After
Spin or when the lid is lifted the motor is immediately de-energized and
the brake solenoid is also de-energized.
This lets the brake latch fall back and catch the little tang on
the brake brand. This brings
the floating brake band to an immediate stop and the Brake Hub quickly
coasts to a stop, bring the transmission and tub to a complete standstill.
The tighter that brake band
is on the brake hub, the quicker the tub is brought from 625rpm to 0rpm.
The brake hub and band is removed in this picture, but its shown in the
inset at the lower left. |
|
Stay Tuned, now its time to paint the cabinet |
|
|
|
|